群組文章
Codeigniter 3: php 的framework,約有14%[2]。以下簡寫CI3,最後更新3.1.5 Jun 19, 2017
smarty 3: 樣版引擎,最後版本 Smarty 3.1.30 Released Aug 14, 2016[3]
pure: css framework[4]
以上選擇,是因為我喜歡簡單的東西。文章共分兩部分,第一部分是smarty3+CI3 結合及測試;第二部分是 pure加入後的整合。
以下範例的下載檔請依你安裝時的版本操作。
一、下載和安裝CI3
CI3 目前已放在github,可以使用github方式安裝,或是直接下載解壓:
到安裝的目錄下,下載及解壓[1]。
$ cd /path/to
$ wget http://codeigniter.org.tw/downloads/file/CodeIgniter_3.1.5
$ unzip CodeIgniter_3.1.5
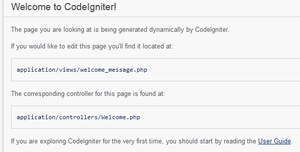
如果路徑權限等設定正確,開啟頁面就能看到ci
二、下載和安裝smarty3
smarty已經改到github,可以使用git的方法來安裝,或直接下載:
$ cd /path/to/application/libraries
$ wget https://github.com/smarty-php/smarty/archive/v3.1.27.zip
$ unzip v3.1.27.zip
$ rm v3.1.27.zip
設定smarty寫入目錄
$ cd /path/to/application/cache
$ mkdir scache
$ mkdir templates_c
設定寫入權限
$ chmod 777 scache/
$ chmod 777 templates_c/
給予SELINUX權限如果有需要的話
# chcon -R -t httpd_sys_rw_content_t scache/
# chcon -R -t httpd_sys_rw_content_t templates_c/
三、設置Smarty3和CI3結合及測試
1. 目前 application/libraries 下已有一個 smarty-3.1.27的目錄,我在application/libraries寫一個Base.php的自寫library:
FILE ./application/libraries/Base.php
<?php
defined('BASEPATH') OR exit('No direct script access allowed');

class Base {
  var $v;
  public function __construct()
  {
    include  APPPATH. "libraries/smarty-3.1.27/libs/Smarty.class.php";
    $view = new Smarty();
    // 設定 Smarty 參數
    $view->left_delimiter = '{{';
    $view->right_delimiter = '}}';
    $view->setTemplateDir(APPPATH . 'views');
    $view->setCompileDir(APPPATH . 'cache/templates_c');
    $view->setCacheDir(APPPATH . 'cache/scache');
//    $view->setConfigDir(APPPATH . 'views/config');
    $view->compile_check = true;
    $view->force_compile = true;
    $view->caching = false;
    $view->cache_lifetime = 86400;
    $this->v= $view;
  }
}
2. 接下來新增 Index這個controller
FILE ./application/controllers/Index.php
<?php
defined('BASEPATH') OR exit('No direct script access allowed');

class Index extends CI_Controller {
  public function __construct() {
    parent::__construct();
    $this->load->library('base');
  }

  public function index()
  {
    $this->base->v->assign('t','TEST');
    $this->base->v->display("index/Test.mtpl");
  }
}
3. 然後增加一個樣版檔 Test.mtpl
FILE ./application/views/index/Test.mtpl
<html>
<body>
this is a
{{$t}}

</body>
</html>
4. 最後我修改了預設的config/routes.php, 開瀏覽器測試,一切OK了
$route['default_controller'] = 'index';
顯示結果:
this is a TEST
目前的檔案目錄結構是這樣的:
.
├── cache
│ ├── index.html
│ ├── scache
│ └── templates_c
├── config
├── controllers
│ ├── index.html
│ ├── Index.php
│ └── Welcome.php
├── core
├── helpers
├── hooks
├── index.html
├── language
├── libraries
│ ├── Base.php
│ ├── index.html
│ └── smarty-3.1.27
├── logs
├── models
├── third_party
└── views
├── errors
├── index
│ └── Test.mtpl
└── index.html
接下來下一篇來整合Pure CSS
參考資料
[1] http://codeigniter.org.tw/downloads/
[2] http://beebom.com/2015/02/best-free-php-frameworks
[3] smarty http://www.smarty.net/
[4] PURE css fw http://purecss.io/
