哈囉大家好,這裡是錢包超級大失血的小編過路君子
要去考證照(LPIC-1 101-500),報名費 200 美金......如果順利考過之後會發心得。
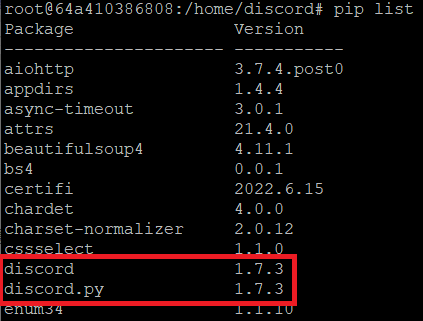
小編從很早之前就開始撰寫 Discord 機器人了,準確來說是從 2021/06/22(1.7.3 版本) 時就開始撰寫了,算算也寫了一年多了。
在這一年間陸陸續續新增及優化許多功能,想當初剛開始寫得時候機器人背後甚至連個資料庫都沒有,也是後來才長出來的。
(所有圖片點擊都可以放大、變高清)
小編本來沒有打算要更新 Discord 機器人的版本,但是最近想要使用 discord.ui.View 的功能,也就是按鈕的功能啦~
而這個功能是 2.0.0 之後的版本才有,所以小編也只好心不甘情不願的更新上去。
果然,大部分差不多,但是還是有少部分地方出錯了,所以小編這篇文章會提起究竟 1.7.3 和 2.0.1 有哪些細微的差別。
Step1. 更新 discord.py 至目前最新版本
那小編在這邊直接採用 pip 的方式來更新 discord.py,所以直接連下兩道更新指令。
pip install --upgrade discord
pip install --upgrade discord.py
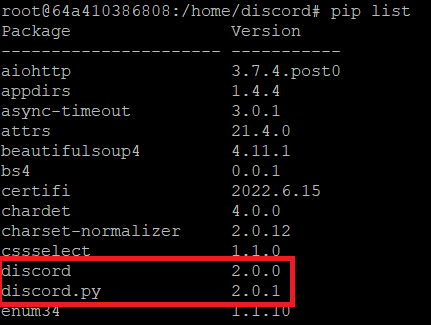
更新完成之後可以使用 pip list 來查看有沒有更新成功。
Step2. 更新機器人加載 Cog 方式
這部分最麻煩,因為 Cog 加載的方式他們有更新了,所以舊的寫法沒有辦法使用了。
那小編這邊會將舊的寫法和新的寫法一併呈現,方便大家來修改自己的程式碼。
那我們先從啟動機器人開始吧~
舊的寫法(1.7.3 及以下版本):
from sys import path
path.insert(0, "./background/")

import core
import discord
from os import listdir
from discord.ext import commands


bot = commands.Bot(command_prefix="s!", intents=discord.Intents.all())

class main(core.administrator):
    @bot.event
    async def on_ready():
        pass


def setup(bot):
    bot.add_cog(main(bot))

if __name__ == "__main__":
    bot.run(TOKEN)

for pyfile in listdir("./background/"):
    if pyfile[-3:] == ".py":
        bot.load_extension("background." + pyfile[:-3])
新的寫法(2.0.0 及以上版本):
from sys import path
path.insert(0, "./background/")

import core
import discord
from os import listdir
from discord.ext import commands


bot = commands.Bot(command_prefix="s!", intents=discord.Intents.all())

class main(core.administrator):
    @bot.event
    async def on_ready():
        intents = discord.Intents.default()
        intents.message_content = True

        for pyfile in listdir("./background/"):
            if pyfile[-3:] == ".py":
                await bot.load_extension("background." + pyfile[:-3])


if __name__ == "__main__":
    bot.run(TOKEN)
可以很清楚的發現,bot.load_extension 從一般的函數變成了異步協程(Coroutines)了。
所以沒辦法像舊版一樣直接放在 bot.run 後面,必須找一個 async def 的函數塞進去,小編看來看去還是 on_ready() 最適合。別忘記在前頭加上 "await" 喔!
至於舊寫法裡的 setup 函數小編不確定是否可以省略,但跑了一年多都沒問題,所以小編也沒有特別去測試。
另外,以下兩行不能省:
intents.message_content = True
如果省略了,那在之後使用 discord.ui.View 時會出事。

另外,如果有用到 unload_extension 或是 reload_extension 這兩個函數。
也必須像上面那樣在前面加上 await 才能正常運作。
相關程式的舊寫法[部分] (1.7.3 及以下版本):
class core(commands.Cog):
    @commands.command()
    @commands.check(Permission.developer)
    async def load(self, ctx, filename):
        self.bot.load_extension("background." + filename)
        await ctx.send("Loaded " + filename + " done!")

    @commands.command()
    @commands.check(Permission.developer)
    async def unload(self, ctx, filename):
        self.bot.unload_extension("background." + filename)
        await ctx.send("Unloaded " + filename + " done!")

    @commands.command()
    @commands.check(Permission.developer)
    async def reload(self, ctx, filename):
        self.bot.reload_extension("background." + filename)
        await ctx.send("Reloaded " + filename + " done!")
相關程式的新寫法[部分] (2.0.0 及以後版本):
class core(commands.Cog):
    @commands.command()
    @commands.check(Permission.developer)
    async def load(self, ctx, filename):
        await self.bot.load_extension("background." + filename)
        await ctx.send("Loaded " + filename + " done!")

    @commands.command()
    @commands.check(Permission.developer)
    async def unload(self, ctx, filename):
        await self.bot.unload_extension("background." + filename)
        await ctx.send("Unloaded " + filename + " done!")

    @commands.command()
    @commands.check(Permission.developer)
    async def reload(self, ctx, filename):
        await self.bot.reload_extension("background." + filename)
        await ctx.send("Reloaded " + filename + " done!")
Step3. 更新機器人 Cog 被加載方式
沒錯,既然讀取 Cog 的方式被改成了異步協程(Coroutines),那當然被讀取的 Cog 也一併被更新成異步協程了。
還記得我們在 load_extension 時會做什麼事情嗎?沒錯,會去呼叫該 py 檔案的 setup 函數來完成加載的動作,而就是我們要來動手腳的部分。
相關程式的舊寫法[部分] (1.7.3 及以下版本):
import discord
from discord.ext import commands

class core(commands.Cog):
    pass


def setup(bot):
    bot.add_cog(core(bot))
相關程式的新寫法[部分] (2.0.0 及以後版本):
import discord
from discord.ext import commands

class core(commands.Cog):
    pass


async def setup(bot):
    await bot.add_cog(core(bot))
Step4. 更新部分函式
基本上函數或是相關資料取得的方式都沒有變化,小編目前也只有發現一個跟之前不同,所以特地將此列出。
取得用戶頭像圖片網址的舊寫法 (1.7.3 及以下版本):
import discord
from discord.ext import commands

class core(commands.Cog):
    @commands.command()
    async def url(self, ctx):
        await ctx.send(ctx.author.avatar_url)


def setup(bot):
    bot.add_cog(core(bot))
取得用戶頭像圖片網址的新寫法 (2.0.0 及以後版本):
import discord
from discord.ext import commands

class core(commands.Cog):
    @commands.command()
    async def url(self, ctx):
        await ctx.send(ctx.author.avatar.url)


def setup(bot):
    bot.add_cog(core(bot))
嘿,沒錯,就是將 avatar_url 換成 avatar.url 而已,簡單吧!
以上就是如何將 Discord bot 從 1.7.3 升級至 2.0.1 版本。
變動最大的部分果然還是 Cog 的部分,從原本的一般函數變成異步協程的函數,導致有幾個 Cog 檔就要改多少個地方。
後記
這篇文章的標題雖然放了 discord.ui.View,但是好像只有一個小小的地方提到,不知道這算不算是標題詐欺。